
ひつじでもできる!さくらのVPSでWordPressでサイト運営できるまでをやる特集の第3回となります。
今回はさくらのVPSにOSとしてCentOS7が入ってるサーバーに、php7.4とMariaDBをインストールしてみる、です。
VPS側に設定をすることがないので、ほかのVPSにCentOS7で動いている環境でも同じように設定できると思います。よろしければご参考にしていだければと存じます。
では、rootに変わってから、張り切ってまいりましょう。
php7.4をインストールしてみよう
CentOSのパッケージに入ってるphpはバージョンが古いです。
試しにyumでインストールしてみたら、php5.4でした。
php     x86_64  5.4.16-48.el7    base   1.4 M
php-fpm  x86_64  5.4.16-48.el7    base   1.4 M
さすがに今から5.4を入れるのはないですね。
現段階で(2021.1段階)で推奨するのはphp7.4です。では、7.4を入れるためにリポジトリから入れていきましょう。
念のために、nginxを停止します。
systemctl stop nginx
では、php7.4の入っているremiリポジトリをインストールします。
rpm -Uvh http://rpms.famillecollet.com/enterprise/remi-release-7.rpm

 Retrieving http://rpms.famillecollet.com/enterprise/remi-release-7.rpm
 warning: /var/tmp/rpm-tmp.tjk1WS: Header V4 DSA/SHA1 Signature, key ID 00f97f56: NOKEY
 Preparing…                          ################################# [100%]
 Updating / installing…
    1:remi-release-7.9-1.el7.remi      ################################# [100%]
では、php7.4をインストールします。
yum install --enablerepo=remi,remi-php74 php php-mbstring php-gd php-mysql php-pspell php-xml php-xmlrpc php-fpm

・・・・
Installed:
   php.x86_64 0:7.4.14-1.el7.remi
   php-fpm.x86_64 0:7.4.14-1.el7.remi
   php-gd.x86_64 0:7.4.14-1.el7.remi
   php-mbstring.x86_64 0:7.4.14-1.el7.remi
   php-mysqlnd.x86_64 0:7.4.14-1.el7.remi
   php-pspell.x86_64 0:7.4.14-1.el7.remi
   php-xml.x86_64 0:7.4.14-1.el7.remi
   php-xmlrpc.x86_64 0:7.4.14-1.el7.remi
 Dependency Installed:
   fribidi.x86_64 0:1.0.2-1.el7_7.1      gd-last.x86_64 0:2.3.0-2.el7.remi
   graphite2.x86_64 0:1.3.10-1.el7_3     harfbuzz.x86_64 0:1.7.5-2.el7
   jbigkit-libs.x86_64 0:2.0-11.el7      libraqm.x86_64 0:0.7.0-4.el7
   libsodium.x86_64 0:1.0.18-1.el7.remi  libtiff.x86_64 0:4.0.3-35.el7
   libwebp7.x86_64 0:1.0.3-1.el7.remi    oniguruma5php.x86_64 0:6.9.6-1.el7.remi
   php-cli.x86_64 0:7.4.14-1.el7.remi    php-common.x86_64 0:7.4.14-1.el7.remi
   php-json.x86_64 0:7.4.14-1.el7.remi   php-pdo.x86_64 0:7.4.14-1.el7.remi
   php-sodium.x86_64 0:7.4.14-1.el7.remi
 Complete!
無事、インストールされました。
PHPの設定でアップロード上限を少し変更する
cd /etc
cp php.ini php.org
vim php.ini

post_max_size = 8M ←128Mに変更する
 ・・・
upload_max_filesize = 2M ←128Mに変更する
NginxにむけてPHPの設定変更
PHPはapache向けの設定になっていますので、これをnginx向きに設定を変更します。
cd /etc/php-fpm.d
cp www.conf www.org
vim www.conf

; Unix user/group of processes
 ; Note: The user is mandatory. If the group is not set, the default user's group
 ;       will be used.
 ; RPM: apache user chosen to provide access to the same directories as httpd
 user = apache    ← nginxに変更する
 ; RPM: Keep a group allowed to write in log dir.
 group = apache ← nginxに変更する
nginxをphpに対応する
cd /etc/nginx/conf.d
vim default.conf

location / {
         root   /var/www/html;
         index  index.html index.htm;  ← index.phpを追加する
     }

# proxy the PHP scripts to Apache listening on 127.0.0.1:80
#
#location ~ .php$ {
# proxy_pass http://127.0.0.1;
#}
# pass the PHP scripts to FastCGI server listening on 127.0.0.1:9000
#
#location ~ \.php$ {
#    root           html;
#    fastcgi_pass   127.0.0.1:9000;
#    fastcgi_index  index.php;
#    fastcgi_param  SCRIPT_FILENAME  /scripts$fastcgi_script_name;
#    include        fastcgi_params;
#}

"proxy the php"から"}"までの#をはずす。
rootにフルパスを指定する
fastcgi_param の"/scripts"を"$document_root"に変更する

【変更後】
location / {
    root   /var/www/html;
    index  index.html index.htm index.php ;
}

# pass the PHP scripts to FastCGI server listening on 127.0.0.1:9000
#
location ~ .php$ {
root /var/www/html;
fastcgi_pass 127.0.0.1:9000;
fastcgi_index index.php;
fastcgi_param SCRIPT_FILENAME $document_root$fastcgi_script_name;
include fastcgi_params;
}
変更後、nginxとphp-fpmを再起動する。php-fpmの自動起動も設定する。
systemctl restart nginx
systemctl restart php-fpm
systemctl enable php-fpm
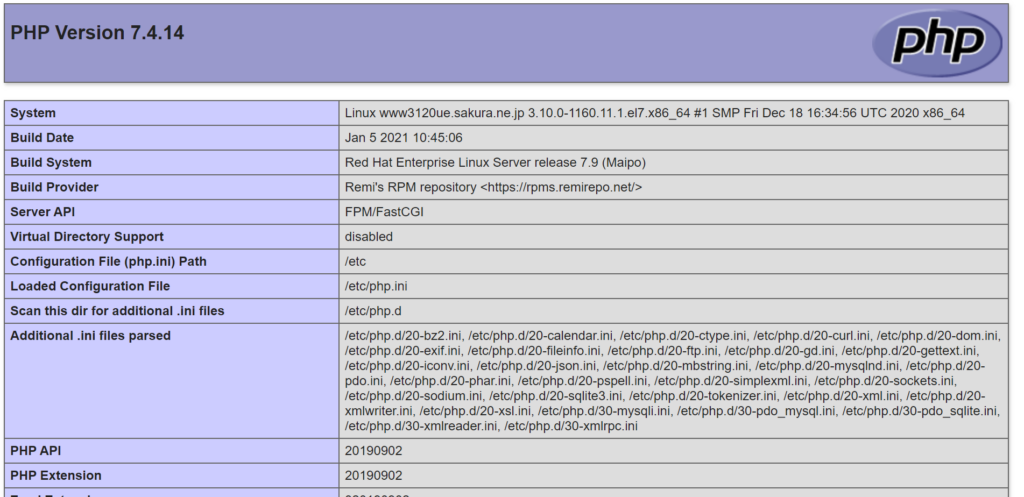
ブラウザーで確認します。PHP情報がでれば成功です。
cd /var/www/html
vim index.php

<?php
phpinfo();
?>
http://(アドレス)/index.phpの画面
これで、php7.4の準備は完了です。お疲れさまでした。
同じ環境なのにうまくいかない場合がありましたので、もし、つまずいたら以下を試してみてください。
1.さくらのVPSのパケットフィルターを解除する。(port9000を開ける)
2./var/www/html の所有者や権限を変えてみる。
これらを試してください。
参考資料

MariaDB10.5をインストールしてみる。
CentOSのパッケージに入ってるMariaDbはバージョンが古いです。
標準のMariaDBのバージョンは5. 6です。問題なく動きますが新しいwordpressでは最新に変更するように推奨されていますので最新を今回インストールします。
公式のCentOS7x64のMariaDB10.3 Stableのリポジトリ情報
を追加します。
curl -sS https://downloads.mariadb.com/MariaDB/mariadb_repo_setup | sudo bash

[info] Repository file successfully written to /etc/yum.repos.d/mariadb.repo
[info] Adding trusted package signing keys…
[info] Successfully added trusted package signing keys
これでMariaDBのリポジトリが入りました。
MariaDBをインストールしていきます。
yum -y install mysql-server

Installed:
   MariaDB-compat.x86_64 0:10.5.8-1.el7.centos
   MariaDB-server.x86_64 0:10.5.8-1.el7.centos
 Dependency Installed:
   MariaDB-client.x86_64 0:10.5.8-1.el7.centos
   MariaDB-common.x86_64 0:10.5.8-1.el7.centos
   boost-program-options.x86_64 0:1.53.0-28.el7
   galera-4.x86_64 0:26.4.6-1.el7.centos
   pcre2.x86_64 0:10.23-2.el7
   perl-Compress-Raw-Bzip2.x86_64 0:2.061-3.el7
   perl-Compress-Raw-Zlib.x86_64 1:2.061-4.el7
   perl-DBI.x86_64 0:1.627-4.el7
   perl-IO-Compress.noarch 0:2.061-2.el7
   perl-Net-Daemon.noarch 0:0.48-5.el7
   perl-PlRPC.noarch 0:0.2020-14.el7
   socat.x86_64 0:1.7.3.2-2.el7
 Replaced:
   mariadb-libs.x86_64 1:5.5.68-1.el7
 Complete!
これでMariaDBはインストールできました。念のために確認します。
mysql --version

mysql  Ver 15.1 Distrib 10.5.8-MariaDB, for Linux (x86_64) using readline 5.1
MariaDBの10.5.8であることが確認できました。
データーベースを起動して、自動起動も設定しておきましょう。
systemctl enable mariadb
systemctl start mariadb
データーベースを設定してみる
設定を行うにあたり確認しておくこと
MariaDBにもrootが存在しておりパスワードを設定する必要があるのですがCentOS7のパスワードと共通で行きます。基本的には全部”Y”で答えてください。(1か所だけ”n”があります)
mysql_secure_installation

NOTE: RUNNING ALL PARTS OF THIS SCRIPT IS RECOMMENDED FOR ALL MariaDB
       SERVERS IN PRODUCTION USE!  PLEASE READ EACH STEP CAREFULLY!
 In order to log into MariaDB to secure it, we'll need the current
 password for the root user. If you've just installed MariaDB, and
 haven't set the root password yet, you should just press enter here.
 Enter current password for root (enter for none): ←無記入(Enterのみ)
 OK, successfully used password, moving on…
 Setting the root password or using the unix_socket ensures that nobody
 can log into the MariaDB root user without the proper authorisation.
 You already have your root account protected, so you can safely answer 'n'.
 Switch to unix_socket authentication [Y/n] y
 Enabled successfully!
 Reloading privilege tables..
  … Success!
 You already have your root account protected, so you can safely answer 'n'.
 Change the root password? [Y/n] y
 New password:    ←パスワード入力
 Re-enter new password: ←パスワード再入力
 Password updated successfully!
 Reloading privilege tables..
  … Success!
 By default, a MariaDB installation has an anonymous user, allowing anyone
 to log into MariaDB without having to have a user account created for
 them.  This is intended only for testing, and to make the installation
 go a bit smoother.  You should remove them before moving into a
 production environment.
 Remove anonymous users? [Y/n] y
  … Success!
 Normally, root should only be allowed to connect from 'localhost'.  This
 ensures that someone cannot guess at the root password from the network.
 Disallow root login remotely? [Y/n] y
  … Success!
 By default, MariaDB comes with a database named 'test' that anyone can
 access.  This is also intended only for testing, and should be removed
 before moving into a production environment.
 Remove test database and access to it? [Y/n] y
 Dropping test database…
 … Success!
 Removing privileges on test database…
 … Success!
 Reloading the privilege tables will ensure that all changes made so far
 will take effect immediately.
 Reload privilege tables now? [Y/n] y
  … Success!
 Cleaning up…
 All done!  If you've completed all of the above steps, your MariaDB
 installation should now be secure.
 Thanks for using MariaDB!
では、起動してみましょう。
mysql -u root -p

Enter password:     ←ContOS7のパスワードを入力
Welcome to the MariaDB monitor.  Commands end with ; or \g.
 Your MariaDB connection id is 11
 Server version: 10.5.8-MariaDB MariaDB Server
 Copyright (c) 2000, 2018, Oracle, MariaDB Corporation Ab and others.
 Type 'help;' or '\h' for help. Type '\c' to clear the current input statement.

MariaDB [(none)]>show databases; ←データーベースを見る
+--------------------+
 | Database           |
 +--------------------+
 | information_schema |
 | mysql              |
 | performance_schema |
 +--------------------+
 3 rows in set (0.056 sec)

MariaDB [(none)]> exit ←データーベースモードを出る
 Bye
これでMariaDBが正常に動いていることが確認できました。
まとめ
いかがでしたでしょうか
【ひつじでもできる!】さくらのVPSでwordpress! 第3回「php7.4とMariaDBをインストールしてみる」でしたが、うまくできましたでしょうか?
すこし、vimを多くつかいましたが、今後のこともありますので扱いにはなれるようにしてください。そしてまちがえてどうしようもなくなったら、orgファイルをつくってますのでここからCPして復活するようにしてください。
第4回では、いよいよWordPressの設置を行います。
WordPress設置まで頑張っていきましょう。
「ひつじでもできる!」さくらのVPSでWordPress! 目次
【ひつじでもできる!】さくらのVPSでwordpress! 第1回「さくらのVPS おすすめ初期設定」
【ひつじでもできる!】さくらのVPSでwordpress! 第2回「Nginxをインストールしてみる」
【ひつじでもできる!】さくらのVPSでwordpress! 第3回「php7.4とMariaDBをインストールしてみる」