さて、ひつじでもできる!さくらのVPSでWordPressも第4回になります。
今回は、最終目的であるWordPressをインストールしていきます。
ここまでこれた皆様なら最後まで間違いなく設定出来ます。
では、ご一緒にWordPressをインストールしていきましょう
WordPressをインストールしてみよう
インストールにあたって、先にしないといけない事をやっていきます。事前準備ですね。
- データーベースの設定
- nginxのWordpress用設定
- WordPressのダウンロードと設置
- データーベースとwordpressとの接続
- WordPressの設定
ではやっていきましょう。
データーベースの設定
WordPress用データーベースを立ち上げていきます。
mysql -u root -p

Enter password:   ← パスワード入力
 Welcome to the MariaDB monitor.  Commands end with ; or \g.
 Your MariaDB connection id is 12
 Server version: 10.5.8-MariaDB MariaDB Server
 Copyright (c) 2000, 2018, Oracle, MariaDB Corporation Ab and others.
 Type 'help;' or '\h' for help. Type '\c' to clear the current input statement.
MariaDB [(none)]> create database wordpressdb collate utf8mb4_general_ci; ← 入力する
MariaDB [(none)]> exit ← MariaDBから出る
これでWordpressのデーターベース(wordpressdb)が出来ました。
nginxのWordpress用設定
nginxの設定をせずども動くのですが、使う時にエラーが確実にでるのが分かってるので先に設定します。
cd /etc/nginx/conf.d/
vim default.conf

server {
listen 80;
server_name localhost;
client_max_body_size 128M; ← 1行追加する

#charset koi8-r;
#access_log  /var/log/nginx/host.access.log  main;

location / {
    root   /var/www/html;
    index  index.html index.htm index.php;
  try_files $uri $uri/ /index.php?$args; ←1行追加
}
アップロードファイルサイズの変更とパーマリング変更対応です。
終わったらnginx再起動します。
systemctl restart nginx
WordPressのダウンロードと設置
ではWordpressをダウンロードして設置をします。


WordPressのHPからダウンロードしてインストールと言うことをするのでですが、直接ダウンロードしてしまいます。

/var/www/html/ の中でテストしたファイル。「index.phpやindex.html」は削除しておきましょうね。「rm index.html」「rm index.php」で削除できます。
cd /var/www/html
wget https://wordpress.org/latest.tar.gz

--2021-01-20 00:00:00--  https://wordpress.org/latest.tar.gz
 Resolving wordpress.org (wordpress.org)… 198.143.164.252
 Connecting to wordpress.org (wordpress.org)|198.143.164.252|:443… connected.
 HTTP request sent, awaiting response… 200 OK
 Length: 15422346 (15M) [application/octet-stream]
 Saving to: 'latest.tar.gz'
 100%[======================================>] 15,422,346  6.76MB/s   in 2.2s
 2021-01-20 09:23:40 (6.76 MB/s) - 'latest.tar.gz' saved [15422346/15422346]
これで、WordPressの最新版が「latest.tar.gz」でダウンロード出来ました。
ls -l

-rw-r--r-- 1 root root       10 Jan 20 08:41 index.html
-rw-r--r-- 1 root root       21 Jan 20 08:49 index.php
-rw-r--r-- 1 root root 15422346 Dec  9 07:14 latest.tar.gz

rm index.html index.php
rm: remove regular file 'index.html'? y
rm: remove regular file 'index.php'? y

ls -l
-rw-r--r-- 1 root root 15422346 Dec  9 07:14 latest.tar.gz
フォルダーの準備が出来ました。解凍して設置します。
tar xvzf latest.tar.gz
ls -l

-rw-r--r-- 1 root   root  15422346 Dec  9 07:14 latest.tar.gz
drwxr-xr-x 5 nobody 65534     4096 Dec  9 07:13 wordpress
解凍できましたので整理と設置をします。
rm latest.tar.gz
rm: remove regular file 'latest.tar.gz'? y

mv wordpress/* .
rmdir wordpress
chown -R nginx:nginx *
chmod -R g+w *
これで /var/www/html/ にWordPressの設置ができました。
データーベースとwordpressとの接続
データーベースとWordPressの接続は、ブラウザーで行います。
ブラウザーでURLを入力して接続します。http://***.***.***.***
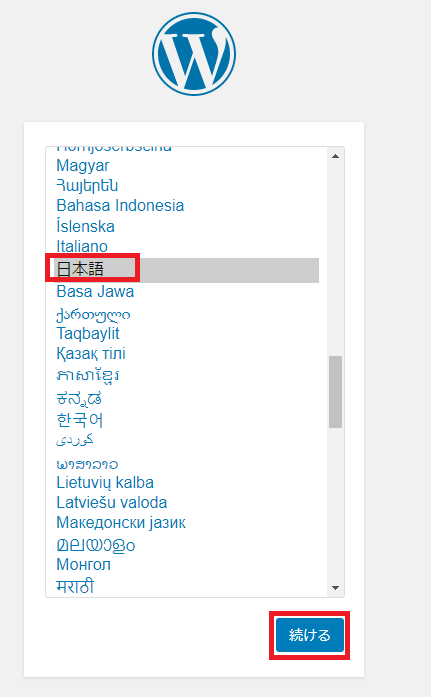
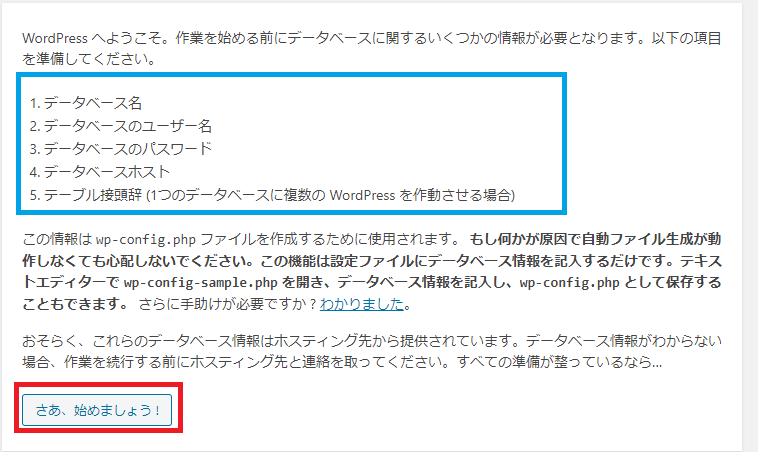
各項目を確認して次にいきましょう。
項目として、
データーベース名:wordpressdb
ユーザー名:root
パスワード:****** データーベースのパスワード
を入力します。
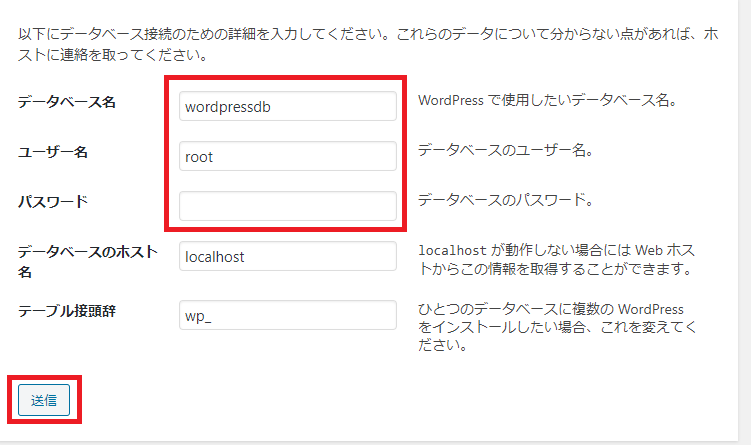
送信を押したら、自動的に「wp-config.php」が作成されるのですが、apacheとちがいnginxは手動設定のようです。
cd /var/www/html/
vim wp-config.php

 For developers: WordPress debugging mode.
 *
 Change this to true to enable the display of notices during development.
 It is strongly recommended that plugin and theme developers use WP_DEBUG
 in their development environments.
 *
 For information on other constants that can be used for debugging,
 visit the documentation.
 *
 @link https://wordpress.org/support/article/debugging-in-wordpress/
 */
・・・・・・・・・・・・

全部のファイル内容をコピーして貼付けてください。
コピーして保存したら、Wordpressの画面で次に進んでください。
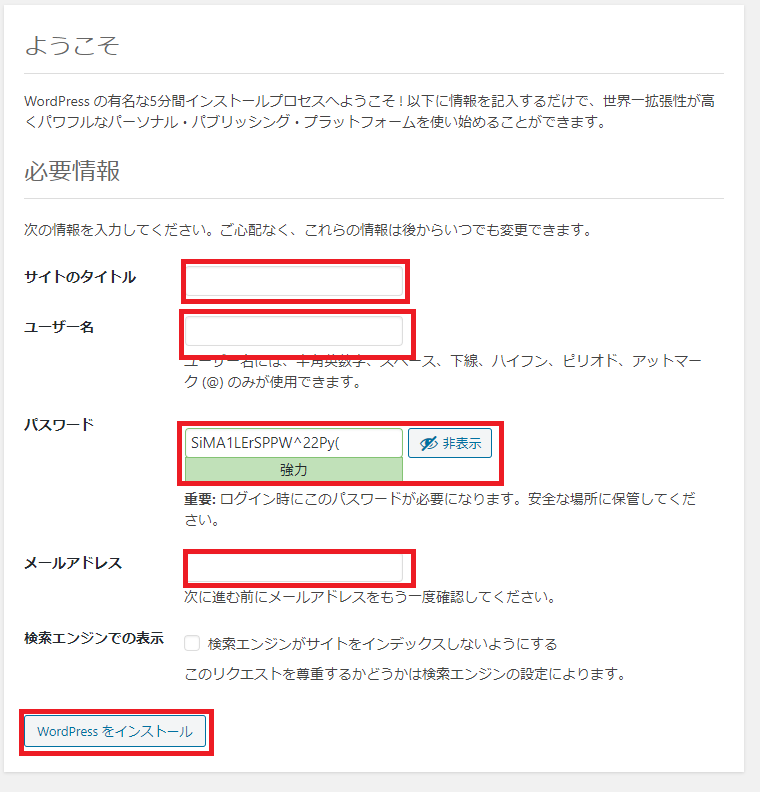
ブログのタイトルとユーザー名及びパスワード・メールアドレスを入力してください。おわったらインストールを選択します。
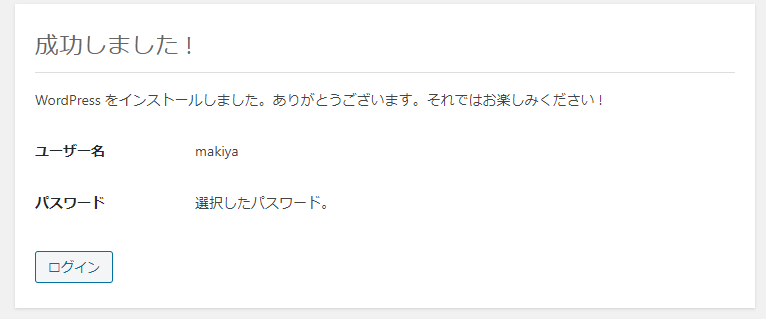
成功です。ログインしてみましょう。
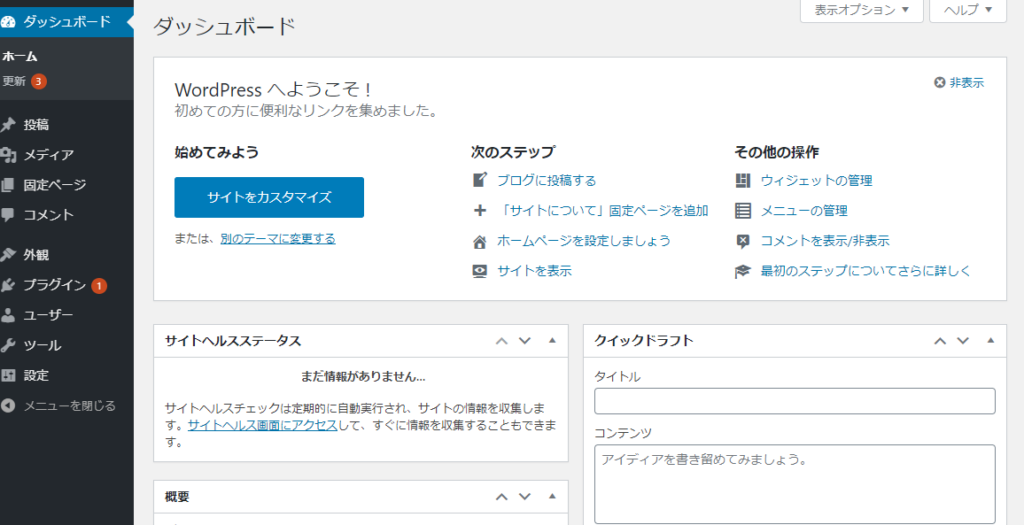
IDとパスワードを入力したら、みなれたダッシュボードにつきました。
サイトヘルスをチェックすると、moduleでimagickとzipが無効化となっていますが、このブログの別記事で解決方法を解説致しております。
まとめ
如何でしたでしょうか。
今回は、本番のWordPressをインストールしてみました。
設定などはこれからですが、ここまで来ると一安心ですね。
「ひつじでもできる!」さくらのVPSでWordpressはこれにて終了です。皆様無事についてこられましたでしょうか?引っかかるポイント等無かったと思います。もしなにかありましたらこのひつじでもできるを最初からみていただければ解決策が出てくると思います。
この記事が、皆様のwordpress環境の改善に役立てば幸いです。
「ひつじでもできる!」さくらのVPSでWordPress! 目次
【ひつじでもできる!】さくらのVPSでwordpress! 第1回「さくらのVPS おすすめ初期設定」
【ひつじでもできる!】さくらのVPSでwordpress! 第2回「Nginxをインストールしてみる」
【ひつじでもできる!】さくらのVPSでwordpress! 第3回「php7.4とMariaDBをインストールしてみる」

