ひつじでもできる!さくらのVPSでWordPressでサイト運営できるまでをやる特集の第2回となります。
今回はさくらのVPSにOSとしてCentOS7が入ってるサーバーに、Nginxをインストールしてみる、です。
VPS側に設定をすることがないので、ほかのVPSにCentOS7で動いている環境でも同じように設定できると思います。よろしければご参考にしていだければと存じます。
では、rootに変わってから、張り切ってまいりましょう。
パッケージを確認してNginxをインストールしてみよう
インストールにあたりルールを決めます。この特集では次の設定で説明をしていきます。今後apacheを利用することも考えて、apacheに近い設定を行っていきます。
wwwのディレクトリ /var/www/html/
wwwのユーザーとグループ nginx
ではやっていきましょう
ファイアーウォールの設定
CentOS7では標準でfirewellが設定されています。まずは起動しているか確認して、してなければ起動してください。
firewall-cmd --statenot runningであれば、起動します。
systemctl start firewalld.serviceでは、ファイアーウォールがwww(http)を外部に公開できるように、ポートの開放を行います。
firewall-cmd --add-service=http --zone=public --permanent
firewall-cmd --add-service=https --zone=public --permanent
各々”sucess!”とでれば成功です。新たな設定で再起動をかけます。
systemctl restart firewalld.service念のために、確認します。
firewall-cmd --list-all

public (active)
   target: default
   icmp-block-inversion: no
   interfaces: eth0
   sources:
   services: dhcpv6-client http https ssh  ← httpとhttpsがあればokです。
   ports:
   protocols:
   masquerade: no
   forward-ports:
   source-ports:
   icmp-blocks:
   rich rules:
サーバが再起動しても自動的にファイアーウォールが自動起動するようにします。
systemctl enable firewalld.serviceこれでファイアーウォールの設定は終わりです。
Nginxのパッケージを確認
まずは、nginxのパッケージが入っているかを確認します。
yum search nginx

・・・・
============================== N/S matched: nginx ==============================
 collectd-nginx.x86_64 : Nginx plugin for collectd
 munin-nginx.noarch : NGINX support for Munin resource monitoring
 nginx-all-modules.noarch : A meta package that installs all available Nginx
                          : modules
 nginx-filesystem.noarch : The basic directory layout for the Nginx server
 nginx-mod-http-image-filter.x86_64 : Nginx HTTP image filter module
 nginx-mod-http-perl.x86_64 : Nginx HTTP perl module
 nginx-mod-http-xslt-filter.x86_64 : Nginx XSLT module
 nginx-mod-mail.x86_64 : Nginx mail modules
 nginx-mod-stream.x86_64 : Nginx stream modules
 owncloud-nginx.noarch : Nginx integration for ownCloud
 pagure-web-nginx.noarch : Nginx configuration for Pagure
 pcp-pmda-nginx.x86_64 : Performance Co-Pilot (PCP) metrics for the Nginx
                       : Webserver
 python2-certbot-nginx.noarch : The nginx plugin for certbot
 sympa-nginx.x86_64 : Sympa with nginx
 nginx.x86_64 : A high performance web server and reverse proxy server
 Name and summary matches only, use "search all" for everything.
入っていました。この中で必要なのは最後の、nginx.x86_64です。
インストールをします。
yum -y install nginx

・・・・・
Dependency Installed:
   dejavu-fonts-common.noarch 0:2.33-6.el7
   dejavu-sans-fonts.noarch 0:2.33-6.el7
   fontconfig.x86_64 0:2.13.0-4.3.el7
   fontpackages-filesystem.noarch 0:1.44-8.el7
   gd.x86_64 0:2.0.35-27.el7_9
   gperftools-libs.x86_64 0:2.6.1-1.el7
   libX11.x86_64 0:1.6.7-3.el7_9
   libX11-common.noarch 0:1.6.7-3.el7_9
   libXau.x86_64 0:1.0.8-2.1.el7
   libXpm.x86_64 0:3.5.12-1.el7
   libjpeg-turbo.x86_64 0:1.2.90-8.el7
   libxcb.x86_64 0:1.13-1.el7
   libxslt.x86_64 0:1.1.28-6.el7
   nginx-all-modules.noarch 1:1.16.1-3.el7
   nginx-filesystem.noarch 1:1.16.1-3.el7
   nginx-mod-http-image-filter.x86_64 1:1.16.1-3.el7
   nginx-mod-http-perl.x86_64 1:1.16.1-3.el7
   nginx-mod-http-xslt-filter.x86_64 1:1.16.1-3.el7
   nginx-mod-mail.x86_64 1:1.16.1-3.el7
   nginx-mod-stream.x86_64 1:1.16.1-3.el7
   openssl11-libs.x86_64 1:1.1.1g-2.el7
 Complete!
これでインストール完了です。
nginxを起動しましょう。
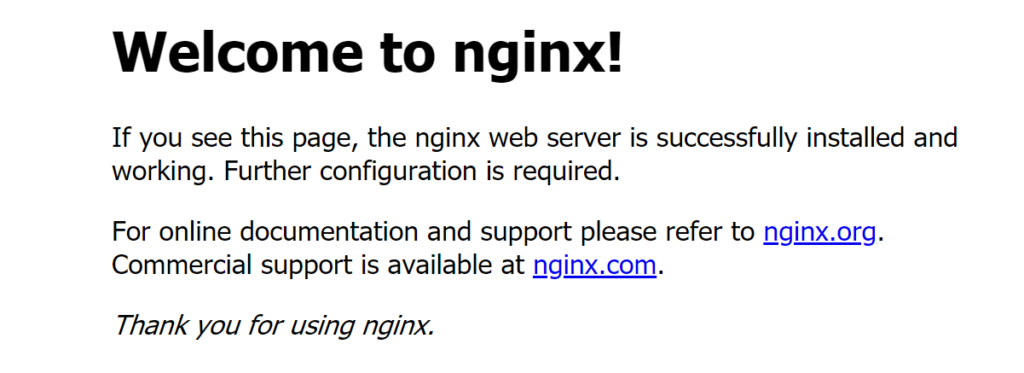
systemctl start nginxブラウザーでIPアドレスを入力して確認してください。

インストールできたことが確認できました。
nginxの自動起動を設定しておきます。
systemctl enable nginxこれでnginxのインストールは終わりです。次から設定に入っていきます。
Nginxのパッケージがなかったらどうするのか?
searchしたときに、nginx.x86-64がなかったらパッケージのインストールから開始になります。また、最新を入れたいときにも参考にしてください。
vim /etc/yum.repos.d/nginx.repo

[nginx]
name=nginx repo
baseurl=http://nginx.org/packages/mainline/centos/7/$basearch/
gpgcheck=0
enabled=1
これでパッケージが追加されたはずです。確認します。
yum search nginx
これで、nginx.x86-64があれば完璧です。インストールしてください。
yum -y install nginxインストールできたことをブラウザーで確認してください。
最初からパッケージ入っててnginxいれたけど最新式入れたい
手順は一緒ですが、一旦いれたnginxをアンインストールしましょう。
yum -y remove nginxアンインストールがおわったら、パッケージを登録してから再度インストールしてください。
Thanks for using nginx!
 Please find the official documentation for nginx here:
 http://nginx.org/en/docs/
 Please subscribe to nginx-announce mailing list to get
 the most important news about nginx:
 http://nginx.org/en/support.html
 Commercial subscriptions for nginx are available on:
 http://nginx.com/products/

 Verifying  : 1:nginx-1.19.6-1.el7.ngx.x86_64                              1/1
 Installed:
   nginx.x86_64 1:1.19.6-1.el7.ngx
 Complete!
最初のパッケージでは1.16.1でしたが、入れなおしたら1.19.6がインストールされました。
systemctl start nginx再起動して、ブラウザーで確認します。

先ほどと表示は違いますが、起動確認できました。
忘れずに、自動起動の設定をしておきましょう。
systemctl enable nginxお疲れさまでした。
nginxの設定をやってみよう
wwwのディレクトリの設置と設定をします。
mkdir -p /var/www/html
chown -R nginx:nginx /var/www/html
これで、ディレクトリーの準備は終わりました。
nginxにwwwのディレクトリーの場所を指定します。
cd /etc/nginx/conf.d
cp default.conf default.org
vim default.conf

server {
listen 80;
server_name localhost;
#charset koi8-r;
#access_log  /var/log/nginx/host.access.log  main;

location / {
    root   /usr/share/nginx/html;  ←/var/www/html;  に変更
    index  index.html index.htm;
}

#error_page  404              /404.html;

# redirect server error pages to the static page /50x.html
#
error_page   500 502 503 504  /50x.html;
location = /50x.html {
    root   /usr/share/nginx/html;
変更がおわったら、nginxを再起動します。
systemctl restart nginxこれで、wwwディレクトリーが変更になりました。念のために確認します。
cd /var/www/html
vim index.html

test page
ブラウザーでhttp://(アドレス)で”test page”とでていれば成功です。
これでnginxの起動までできました。
まとめ
いかがでしたでしょうか
すでにapacheに慣れている方には、ちょっと難しかったのではないでしょうか?
apacheであれば、すんなりできる設定もWordpressを入れる段階になったらいきなりハードになりますので頑張ってついてきてください。
では、第3回でお会いしましょう。
「ひつじでもできる!」さくらのVPSでWordPress! 目次
【ひつじでもできる!】さくらのVPSでwordpress! 第1回「さくらのVPS おすすめ初期設定」
【ひつじでもできる!】さくらのVPSでwordpress! 第2回「Nginxをインストールしてみる」
【ひつじでもできる!】さくらのVPSでwordpress! 第3回「php7.4とMariaDBをインストールしてみる」


